Showing posts with label rice. Show all posts

Tuesday, April 23, 2013

Tempeh Fried Rice


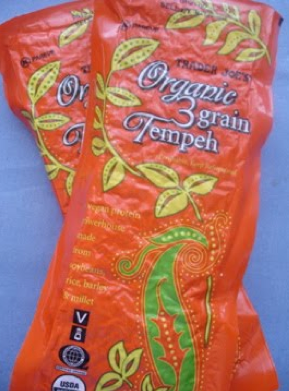
I've had this glorious pack of tempeh sitting in the fridge for a couple of weeks. It's the 3-grain kind from Trader Joe's, and I think I've finally found a good purpose for it...fried rice. [Note: Tempeh is a superfood of sorts, has 20 grams of protein per serving, and it takes on the flavor of whatever sauce you mix it with. Plus, it's cheap--$1.99. Faboo!]


Chicken fried rice or anything fried rice is so tasty, and when you make it at home you can cut back on preservatives (the non-pronounceable) and fat/calories (the oily piles of the takeout version). You can also add any protein you like, so leftover chicken, pork, bacon, or shrimp are all good options. But equally as tasty are black beans, tofu, edamame, extra eggs, or tempeh. Mix and match. This is also a fun thing to make for a group or kids event, because you can set out the warm ingredients, along with a large bowl of rice, and they can top the rice with the ingredients they wish.

Example:
  • 1 large bowl of rice
  • 6 small bowls (scrambled eggs; cooked broccoli, cooked carrots, green peas, water chestnuts, sprouts, edamame, chopped bell pepper, onions, etc.)
  • Bottle of soy sauce, teriyaki sauce, or sweet & sour sauce at the end of the 'buffet'

OKAY, getting back to fried rice...it doesn't have to be oily and one shade of tan...it can be fun a colorful!


Fried Rice
6-8 servings
  • 4 cups cooked rice (use your favorite kind)
  • 1 TB olive oil
  • 2 garlic cloves, chopped
  • 1/2 small onion, chopped
  • 1 pound of your favorite protein (tempeh, chicken, shrimp, tofu, beef, pork, etc.)
  • 3 large eggs, whisked
  • 1 16-oz bag of stir fry veggies (or use fresh)
  • 1 fresh veggie (a zucchini, bell pepper, cucumber, broccoli, etc.)-->This is optional, but really adds color and freshness to the dish. 
  • 1/4 cup reduced sodium soy sauce
  • Dash of pepper
  • Dash of hot sauce (optional)
  • wok/large saute pan & a wooden spoon + a bowl and fork/whisk for the eggs
  • 1/2 cup toasted cashews (optional)
 
1: Heat the pan on medium-high heat. Add the oil, garlic and onion and let saute. Then, add the 'protein' to cook it through.

2: Add the eggs and let cook/scramble. Add the veggies, cover, and let cook for 7 or so minutes.

3: Add the cooked rice and heat, seasoning with soy sauce, black pepper, hot sauce and any other spice you like. Top with cashews or crunchy noodles for a little crunch.

Serve hot. Makes great leftovers.


Happy Woking!
Laurel

Thursday, May 24, 2012

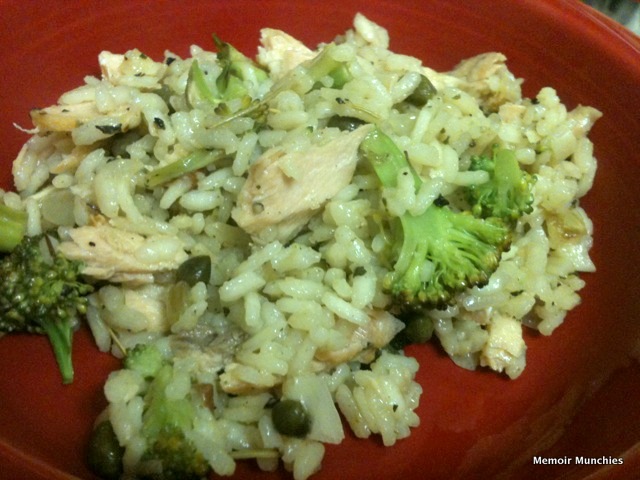
Salmon Risotto

EXTRA! EXTRA!
Memoir Munchies reaches 200 Posts!
I missed the 2-year anniversary of the blog in the midst of school craziness, so 200 posts deserves a little somethin' somethin.' 
Why not a colorful collage and some salmon risotto???


Have you seen this awesome invention in the grocery store? 
  • Texas is often way too hot to grow basil, so I usually buy it. However, I never use it all up before the little leaves wilt and go bad. So why not buy a frozen alternative? They're just tiny frozen "icecubes" of chopped basil leaves.


Salmon Risotto
4 servings

1 TB olive oil
1 TB butter
1 cup arborio rice
4 garlic cloves, chopped
2 shallots, chopped
2 cups low sodium chicken broth
8 ounces salmon filet
1 cup broccoli (fresh or thawed)
1/4 cup chopped almonds (optional)
1 TB fresh basil or 1 t. frozen basil
3/4 t. sea salt
1/4 t. pepper
1/2 t. each: rosemary + basil
3 TB capers

1 CHOP: Chop the garlic and shallots and set aside. Then, chop the broccoli (small bite-sized). In a large skillet or wok, heat on medium to medium high. Add olive oil and butter and let melt. Rotate skillet once so bottom is coated with oil/butter. Add the arborio rice, garlic and shallots and saute for 2-3 minutes, until rice is toasted and slightly brown (slightly!). Stir the mixture with a wooden spoon during the sauteing.

2 LIQUIFY: Add the chicken broth and stir. Add in the rosemary and continue to stir until rice has cooked and thickened to 'al dente' (cooked but still firm/chewy to the bite). This will take about 20-25 minutes.

STEP THREE: In the meantime, heat at medium a second skillet or a grill pan, spraying with nonstick oil (or 1 t. olive oil). Coat the bottom of the pan. Sprinkle a pinch (1/8 t.) of sea salt and a dash of pepper on each side of the salmon, and lay it onto the skillet/grill pan. Sprinkle the broccoli around the fish to "grill" it, too. Cook the fish at least 5 minutes on each side, being careful not to serve raw or overcook (fish will dry out). Remove the salmon from the heat.

STEP FOUR: Toss the cooked broccoli and almonds into the risotto and stir. Add the fresh/frozen basil, dried rosemary and dried basil, and stir.  Once the fish is cool enough to handle, flake into bite-sized pieces with a knife. Add the salmon to the risotto and gently stir. Add the capers and stir.  Lastly, add 1/4--1/2 teaspoon salt and a few dashes of pepper, to taste. Serve!


Thanks so much for reading, cooking, inspiring, and eating with me on this fun journey! I started this blog as a stress reliever--cooking in between classes, work and writing many, many papers. Now I'm finished with school and have found this blog to be so much more than just a "sanity keeper." I've learned so much, have connected with dear people over breaking bread, and have found a passion for healthy living and eating. Thanks to Matt (hubby), Sam (dog), family, friends, and coworkers for tastetesting each recipe and giving your honest (albeit very kind!) opinions. Sam...just got crumbs that fell to the floor and can't speak, so he's just there for support (and free smells). 

There are some exciting changes happening to Memoir Munchies...a little summer makeover, for starters. Stay tuned, and here's to 200 (or 2,000?) more posts!


Happy eating!
Laurel

Sunday, May 6, 2012

Cinco de 'Ladas


You didn't think I'd miss out on the Cinco de Mayo fun, did you? Now, granted, this is posting the day after Cinco, that probably means we celebrated the day of. And we did!

I have never made enchiladas before. Never. Probably because enchiladas are not my favorite Mexican dish, but gooey melted cheese and spinach are two of my favorite foods--why not stuff the enchiladas with them? This recipe is easier than I thought, with only 10 minutes oven time. We used Boca crumbles (soy-based ground "meat"), and I honestly thought it was beef inside of the enchiladas. Of course, you can used any ground or chopped meat that you like, but the crumbles are a really nice alternative that come seasoned.

Ole Enchiladas
Makes 16 enchiladas, or 8 servings

2 TB olive oil
1 onion
1 green bell pepper
7 garlic cloves (2 TB)
4 jalapenos
1/2 t. sea salt + 1/4 t. pepper + 2 TB cumin + 1/4 cup chili powder
16 corn tortillas (I used white corn)
Can of nonstick spray
2  28-oz cans of diced tomatoes, drained
12 oz. frozen spinach (1 box) + 1/4 cup water
2 cups chopped 'meat' (I used Boca seasoned crumbles)
3-4 cups shredded cheese
1/4 cup chopped cilantro

step one: Chop the onion, bell pepper, garlic and jalapeno (seeds and veins removed). In a large saute pan (or wok), heat oil over medium high. Add your chopped veggies + salt and pepper and cook for 7 minutes, stirring occasionally, until onions are translucent and slightly brown on the edges.  Add the cumin and chili powder and stir. Turn heat down to medium.

step two: Preheat oven to 400 degrees. Open the cans of tomatoes and drain them. Add the tomatoes to the veggie mixture. In a second saute pan, cook the frozen spinach and water until thawed and warm. Drain and add to the veggie mixture. In the same pan, cook the 'meat'; season with salt and pepper, if not already seasoned. Once cooked, add to the veggie mixture and stir.

step three: Take out a baking sheet. Using the nonstick cooking spray, spray each side of 16 tortillas and layer onto the baking sheet. Cover with a sheet of foil and bake for 5 minutes, or until tortillas are soft and 'rollable.' Leave the oven on.

step four: Letting the tortillas cool for a couple of minutes, spray a 9X12 pan with nonstick spray. Spread 1/2 cup of sauce in the bottom of the pan. Sprinkle 2 TB of shredded cheese and 2 TB of sauce into each tortilla. Roll it up and place it, seam side down, in a row in the baking pan. Repeat this for all 16 tortillas (you might need a small bread pan if they don't all fit in one pan). Pour the remaining sauce over all of the enchiladas and sprinkle with 1-2 cups of cheese. Bake for 10 minutes and serve piping hot. Serve with guacamole and chips, rice and beans, or salad on the side.

Cilantro Rice
8 servings, 1/2 cup each

2 cups brown rice
4 cups water
1/2 t. sea salt and 3 dashes of pepper
3 TB butter or margarine
2 TB cumin (optional)
1/2 chopped cilantro

In a large pot on high heat, combine rice, water, salt and pepper. Heat until rapidly boiling, then reduce heat to a simmer and cover the pot. Cook for 25 minutes, or until water is absorbed and rice is soft and cooked thoroughly. Fluff with a fork and toss in cumin and cilantro.


Happy eating!
Laurel

Monday, April 23, 2012

Stuffed peppers

The first time I had one of these was not in Texas as a child. It was in Massachusetts. Yes, I said it. And it was pronounced "stuft PEH-puhs" I'll have you know. An old boyfriend's mother was so sweet, and she decided she would comfort my homesickness (and cravings for Tex-Mex) by making her stuffed bell peppers. Let me just say, I was so thankful for her efforts, but this is not a dish you'll EVER find on a menu in Tex-Mex country. Poblano peppers are usually the ones stuffed, and it's with cheese, cream sauce and chicken. She used rice, ground beef and pinto beans. :) But it was the thought that counted, so I've decided to bring a little authentic Tex-Mex flavor to this Yankee creation. It's easy, healthy, and pretty darn tasty. Enjoy.

Stuffed Peppers
4 servings

4 bell peppers, any color
1 cup brown rice or 1/2 cup quinoa
1 pound white meat chicken
3 TB + 2 TB cumin
1/4 + 1/2 t. salt
1/4 + 1/4 t. garlic powder
1/4 t. red pepper flakes
1 can black beans, drained and rinsed
1/4 cup (small handful) of chopped cilantro
1 cup salsa

Optional toppings: shredded cheddar or mozz, salsa, jalapenos, sour cream

1 Cook: In a rice cooker or pot, cook the rice according to package directions. In the meantime, cut the tops off of the peppers and scoop out the seeds (see photo). Set the peppers and the tops aside. Cut the chicken into small chunks (1/2 inch cubes). Heat a wok or large skillet on medium high. Add 1/4 cup water and the chicken and let cook for two minutes. Season with 3 TB cumin, 1/4 t. salt, 1/4 t. garlic powder and red pepper (optional). Continue to stir and saute until the chicken is thoroughly cooked. Set aside.

2 Combine: Once the rice is cooked, stir in the black beans and 2 TB cumin, 1/2 t. salt (if unsalted beans), 1/4 t. garlic powder, and the chopped cilantro. Preheat oven to 375.

3 Fill: Line a baking pan with walls with foil. (I usually use a 9-inch round for 4 peppers). Using a tablespoon, layer the rice & beans mixture, then 1 TB of salsa, then several bites of chicken multiple times until the pepper is filled to the top. You should have no more than 4 sets of layers. Finish the pepper by placing the top piece back on. Repeat this for the rest of the peppers. Bake for 35-45 minutes, or until peppers are slightly soft on the outside and the contents inside are piping hot. Garnish with shredded cheese, sour cream, jalapenos and salsa, if you like.

Enjoy the peh-puhs!


Happy eating!
Laurel

Thursday, July 28, 2011

Not-so-fried Rice


No arteries need to meet greasy, limp Chinese take out. But this *healthier* version is easy, tasty, and has endless possibilities. For this adventure, I used a food I've never cooked with before:  

napa cabbage.
It gave a bit of crunch, some filler (besides rice), and color to this dish. After making a batch, I put the leftovers into 2-cup containers and have been grabbing it for an easy lunch at work or a no-thought dinner after a long day. (PS: Napa cabbage has 28 calories per cup, according to this awesome USDA Food-a-pedia.)


Not-so-fried Rice
4-6 servings

Ingredients:::
4 cups water + 1/3 cup water
2 cups wheat rice
1 1/2 cup carrots
1 zucchini
3 stalks celery
1/2 cup peas or snow peas
1 egg + 1 egg white
1/2 teaspoon garlic powder
Dash of ground ginger 
3 cups Napa cabbage
1/2 TB sesame oil (optional) 
Garnish: sesame seeds, 1/4 cup chopped green onions
1/4 cup reduced sodium soy sauce

pot for water with lid, large wok or skillet with lid, wooden spoon 
Directions:::   
step one: Heat a pot of water with rice and cover. When it boils, remove lid, stir, and recover, reducing heat to a simmer. Let cook 15 or so minutes.
step two: While waiting for the rice, chop up the carrots, zucchini, and celery and put into the heated wok with 1/3 cup of water. Cover and let cook on medium-high for 5 minutes. Add the egg and peas and let egg cook for a few minutes. (Some people like to scramble and cook egg first, before adding to veggies.) Next, add the garlic powder, ginger, sesame oil, and cabbage. Gently stir with spoon and recover for a few minutes.
step three: Check on the rice. If all of the water has been absorbed and a taste test of the rice shows it's cooked, remove rice from heat and gently add to wok. Combine with spoon and add soy sauce. Toss thoroughly. Let cook in wok for a few more minutes and serve in a bowl with garnish.


I mentioned the USDA's new My Food-a-pedia 
This is super helpful. You can look up nutrition values of various foods, get personalized meal plans, etc, and it's also great for kids to use, too. Try this: Click on "Look up a food." Put in anything...I did popcorn. Not only does it give you the nutrition facts for popcorn (and which category it goes in on your plate), it gives you the facts of buttered, low fat, natural popped with butter, air popped, and other varieties. So simple! I hope this helps keep you and your family healthy and happy. 
Happy eating!